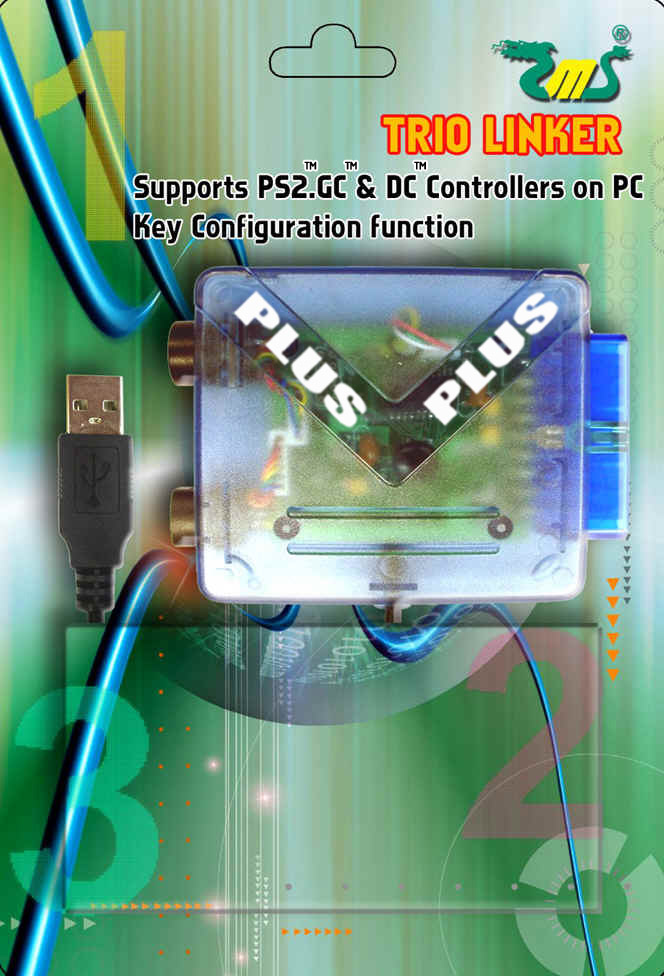
Trio Linker Plus
Product
no.0505
Order
Form![]()
WEIGHT : 155 g
PACKING SIZE : 14 cm X 20 cm X 3.2 cm
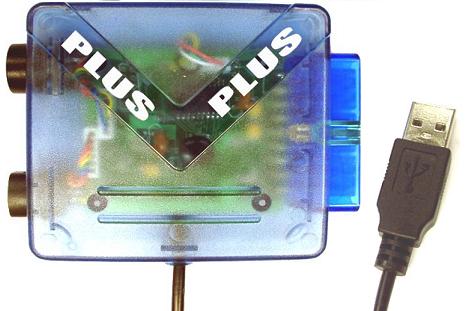
PRODUCT SIZE : 9 cm X 7 cm X 1.7 cm
________________________________________________________________________________________________
Main Features
1. Supports PS2™, GC™ and DC™ controllers on PC
controllers.
3. Supports Joy2key, Key Mapping and force feedback function.
4. Supports Plug and Play.
5.
note : i. PS3™ games are supported, but PS3™ firmware must be updated.
ii. GC
some buttons of
* function 3 is only workable with driver installed.
*
For details, please have a look at here.
#0505 Trio Linker Plus Supports

Installation procedure
1. Download the setup file from here.
2. Run the setup file, and the installation would start and finish automatically.
*Upon successful installation,
please connect the #0505 Trio Linker Plus to the USB port of the PC.Y
ou could find the
Driver update History
#0505 Trio Linker Plus Driver V3.4 (Download) 2005-04-12
#0505 Trio Linker Plus interface function introduction:
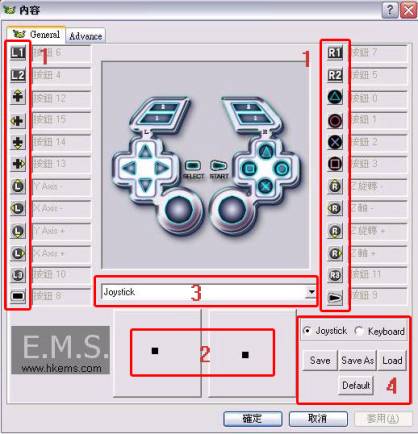
The interface of Trio Linker can be separated into 5 areas
1. Key configuration function. Setting is user friendly, simply use your mouse to click on any position within area 1 and “press any key” will appear. Press any key and you will be able to set the controller to what is indicated in the interface.
2. Displays the movement of the analog
3. Select the controller type used
4. “Joystick”& “Keyboard” selection enables Trio Linker to switch from ordinary controller and mock keyboard function.
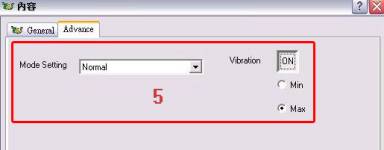
“Save” records what has been set “Save as” records elsewhere “Load” loads saves.5.“Advance” sets force feedback function on the controller. “Normal” is the ordinary mode “Compatible” does not provide force feedback function, to turn on the force feedback function, just choose on/off. “Vibration” when “Min” is selected, there will be minimum vibration. “Max” will have maximum vibration.
*Note: When 3 different types of controllers are simultaneously inserted to the Trio Linker, Trio Linker
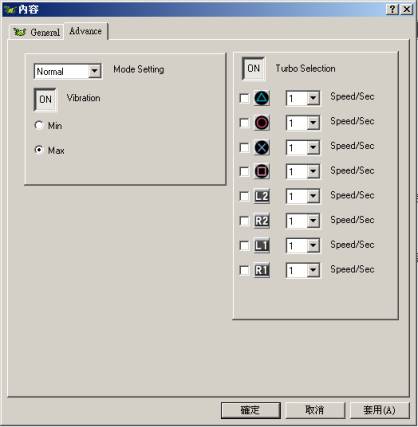
would only enable the controller that was first inserted.Turbo function
At the Trio Linker main menu interface, click “advance”. On the right hand side of the interface, is the Turbo function. On/Off enables and disables the Turbo function. Enable the Turbo function and setup any button you would like found under “On/Off” button to be Turbo mode. Multiple buttons can be setup. Under “Turbo Selection”, there is a choice of speed. However, please beware that if the speed is too high, the game may not be able to detect the button.
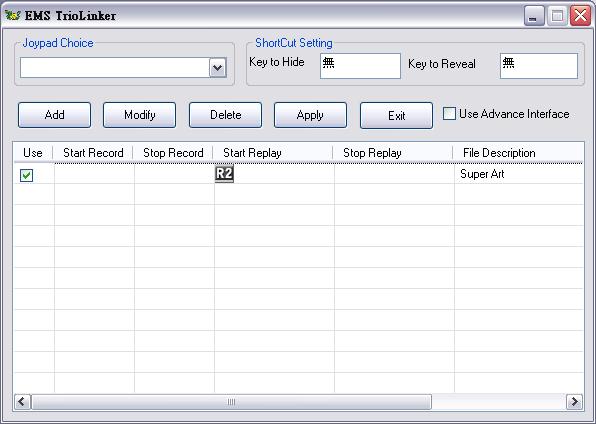
Macro Function
Macro Main Window :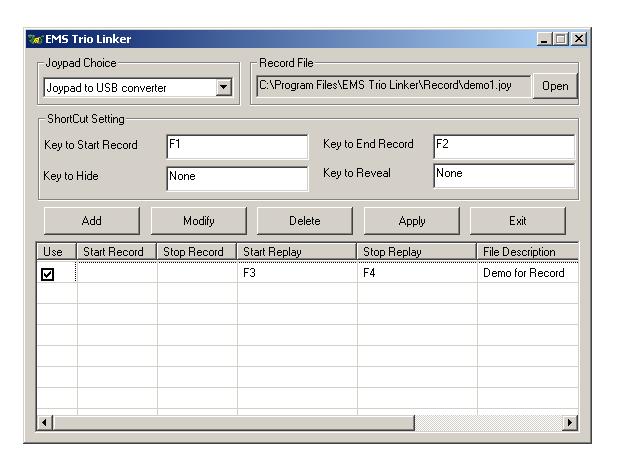
Macro function.
When Joypad Option is set "joystick", Macro function is compatible with PC
joypad. On the other hand, when Joypad Option is set "keyboard", Macro
functioin is compatible with PC keyboard.
2) Macro Interface function. This function is basically divided into two
parts.
Function 1:
This function records all buttons pressed (on the controller/
keyboard) throughout the game. The recording can be replayed over and over
again whenever you like during the game. Macro editor can edit
the recorded file.
(When recording, there must be a complete record file path. Through Macro
Main window "Add", you can add file, input setting value. Then through
Macro Main window "Open", run.)
Function 2:
This new function inputs all buttons through Macro Editor into *.joy file
as a sequence of different actions. You can then choose any button on the
controller or keyboard as the shortcut key. Simply by pressing that
shortcut key, you can replay the sequence of buttons that you have set.
This function is especially useful for fighting games.
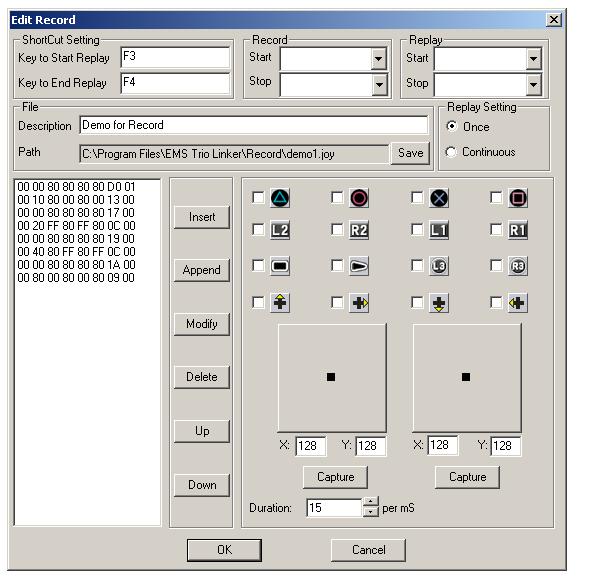
Macro Editor :
*Note: Because of synchronization, save & replay may not be suitable for
certain games (such as Racing games as there are time differences).
However, in arcade games, it is perfect.
For example: In a racing game, if I start recording at 00:00:00, when I
replay, if I am 1 second slower(00:00:01), because of the 1 second time
difference between starting to record and starting to replay, it may
result to the car crashing or losing control during the replay. Therefore
not being able to perform like the recording and finish the race.
(To start Macro function, first set Macro action. Then Click "Apply" in
Macro Main Window. The "Shortcut" in Start Replay. Key to Hide is to hide
Macro interface. Which can save system resources. When Macro is working,
click Exit and Macro will stop all work. "Shortcut" do not use it
simultaneously.)
Digital Pad Setting
With the old Trio Linker drivers, when the user use the digital pad, the analog function would also be affected. This would not be a problem for most of the games, as both of the digital pad and the analog stick are used to control the movement of the character in the game. But recently a customer points out that in a PC game, the left analog stick is used to control the movement of the character while the digital pad is used to control the pointer of the menu. The problem is that when the user move the pointer of the menu, it would let the character in the game move to the same direction.
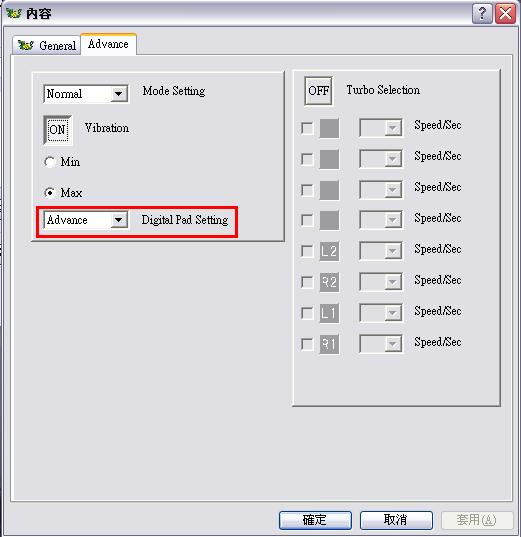
User can set the "Digital Pad Setting" option
to "Advance" mode so as to solve the above problem.
#0505 Trio Linker Plus Driver
V3.
Macro Editor :
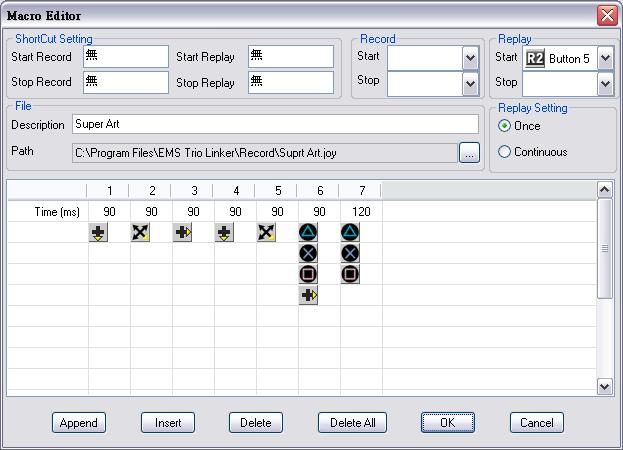
The design principle of this interface is "Simple" and "Convenience". The new interface is much more user friendly so that you could set up your own macro much more easily.
#0505 Trio Linker Plus Driver
V3.Fixed a minor bug in the Macro Editor and added the support of Windows XP64.
#0505 Trio Linker Plus Driver
V3.Fixed a minor bug in the Macro Editor.
#0505 Trio Linker Plus Driver
V3.Fixed a bug in this upgrade which used to occur during the set up process.
#0505 Trio Linker Plus Driver
VThe performance of the joy2key function is improved.
This driver is designed to support 32bit Windows Vista. Please follow the guide below to install the driver:
1. Double click to run the setup file.
2. Connect the Trio Linker to your PC, your PC will pop up a hardware install wizard and ask you for driver.
3. In the install wizard, click the "install from hard disk" button, and direct the install wizard to this directory :
4. After that, you should able to find the "Joypad to USB converter" in the device manager.
This software is a beta version. If you have any suggestions, please kindly inform us.
Designated trademarks and
brands are the properties of their respective owners.
Dual Linker is fully designed and developed in-house by EMS Production Ltd.
email : sales@hkems.com