![]()
Secured USB disk User`s Manual PN:YX00000001
Manual I.Introduction......................................................................................3 1.1 Function introduction..................................................................3
1.2 Secured USB disk outlook (diagram1.1)....................... 3 1.3 System requirements....................................................................3 II. Secured USB disk connection with computer...................... 4 III.Installation of driver..................
.............................................. 4 IV.Secured USB
disk usage.......................................................... 5 4.1 General area usage................................................................... 5 4.1.1 Windows 98/Me/2000/XP................................................ 5 4.1.2 Mac OS 9.x/Mac OS
X
..................................................... 6 4.1.3 Linux 2.4.x .............................................................................
6 4.2 Secured area
usage...............................................................
7 4.2.1 Unlock.........................................................................................7 4.2.2 Edit password............................................................................
7 4.2.3 Formatting
secured USB disk..................................................
8 4.3 Things to note...............................................................................
9 V.Secured USB disk technical area.................................................... 9 VI.Secured USB disk frequently asked questions............................10 VII.Contact us.....................................................................................11 1.1 Function introduction Thank you for buying our USB Disk. This is
one of our news released removable save disk. Using the intellectual property
and skills of EMS, the USB disk space is cut into a secured area (SD) and a
general function area (HD) two areas to guarantee data safety. At the same
time, the secured USB disk is super stable. The damages made from misusage are
down to the lowest and therefore save data is safer. Secured USB disk uses fast memory IC and
USB interface, through USB interface connects to computer, may plug and play,
easy to carry, small delicate outlook, no driver necessary (except for Windows
98). At this moment security USB disk supports Windows 98/Me/2000/XP, Mac
OS9.x/Mac OS X and Linux 2.4.x operation system, qualified USB 1.1 standard. In
Windows 2000/XP operation system, even if user uses non-manager identity to log
in, secured USB disk will still support secured and no driver necessary
functions. Secured USB disk’s main functions
include: --A separation of security area and general
area --Secured area plus password --General area suitable for non-security
data swift save/read --USB disk has built-in tools software,
need not install --Capacity of secured area is according to
the needs of the user to adjust --Need not install driver (Except for
Windows 98) --Carries USB interface, plug and play --Qualified USB 1.0/1.1 standard --LED light displays work status --ANTI-SHOCK EMI PROTECTION --Disable saving switch 1.2 Secured
USB disk outlook (diagram1.1) --IBM PC or an alike computer, notebook computer
or mini notebook computer --
Carries USB interface --Windows
98/Me/2000/XP, Mac OS 9.x/X, Linux 2.4.x 2. Secured USB disk connection with
computer Secured
USB disk via USB connects to the computer. User can directly insert the secured
USB disk to the USB interface; If USB interface is at the back of the computer,
this is very inconvenient; users can use the USB extension cable that is
included to connect to the USB port of the computer and the other end to the
secured USB disk. Secured
USB disk does not need to install any driver for Windows Me/2000/XP, please
directly use it. In Windows 98, please refer to the steps below to install the
secured area and general area driver: 1)
Turn on Windows 98 operation system 2)
Insert the CD-ROM into the C drive 3)
Insert the secured USB disk
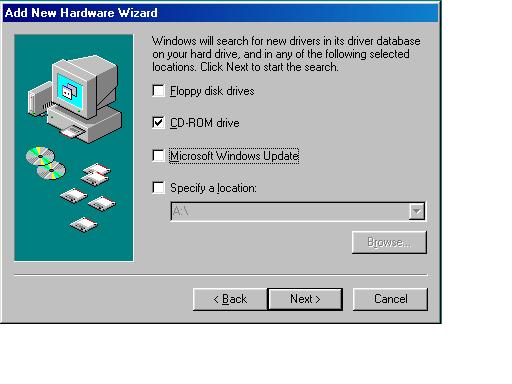
to the USB interface of the computer, at the message box, click “next” to
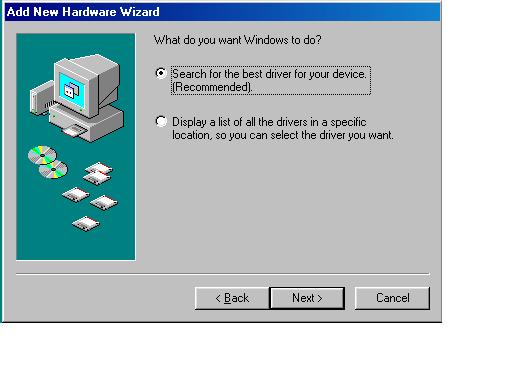
continue to install. (diagram: 3.1) PHOTO:3.1 4)Choose “search for the best driver for your
device (recommended)”, click “next” to continue installation. (diagram: 3.2) PHOTO:3.2 5) Choose “search CD-ROM drive
(C)” also do not choose any other selection; click “next” to continue
installation. (diagram: 3.3) PHOTO:3.3 6)System will automatically check driver program, simply
click “next” until you finish installation. 4.1.1 Windows 98/Me/2000/XP 1)
Turn on your computer 2)
Connect the secured USB disk to the USB interface of the computer,
if the connection is normal, the light on the secured USB disk will light up,
meaning USB disk is working normal. Note:
In Windows XP system, system will check the secured USB disk status from time
to time, which will cause the USB disk LED to light up even when it is in
non-working status. 3)
Open “My computer”, you will find a new added “removable disk”
disk logo (diagram: 4.1) appear, that is the logo for secured USB disk.
Normally, secured USB disk’s logo will be the next alphabet to the last that
you have. Note: Upon your initial usage of the secured USB disk, system will
need a little time to find the driver program, please be patient and wait, you
will not have to wait next time. Diagram 4.1 In Windows Me/2000/XP, a logo will appear
on the right bottom corner of the screen, representing the secured USB disk.
(diagram: 4.2) Diagram 4.2 1)
After using the secured USB disk, please refer to the
steps below to disconnect the USB disk: Windows 98: When the USB disk’s display light is not flashing, the USB disk can be pulled out from
the computer USB interface. The secured USB disk logo will disappear. Windows Me/2000/XP: When the USB disk’s display light
is not flashing, you will need to move your mouse to the right bottom corner of
the screen where you should left click on the USB disk logo, “stop USB Mass
Storage Device-driver”, (diagram: 4.3) click on that, system will then display
another message box, “USB Mass Storage Device can safely remove from the
system”. Click “ok” close message box (diagram: 4.4), then you will be able to
safely disconnect the secured USB disk. 4.1.2 Mac OS 9.x/Mac OS X 1)
Turn on the Mac computer 2)
Insert the secured USB disk into the USB interface of
the Mac computer, your computer desktop will appear a name called “Untitled” logo (diagram 4.5). That
is the secured USB disk logo, now, you can now use the USB disk like the normal
floppy disks. When you need to disconnect the secured USB disk from the USB
interface, first pull the secured USB disk to the recycle bin, and then
disconnect the secured USB disk, or else the data or document on the secured
USB disk will be lost. 4.1.3 Linux 2.4.x Secured USB disk has been formatted when it was first produced, it’s document system is FAT; any Linux kernel 2.4’s Linux notice board can use secured USB disk. USB and USB File system is to be added
to Linux kernel to support USB to use the secured USB disk. 1)
Turn on your computer 2)
Insert the secured USB disk to the USB interface of
your computer, if the light on it lights up, it means that the secured USB disk
and USB interface has successfully connected. Note: Input command sda from mount/dev/sda/mnt, the computer and USB
disk maybe different and therefore refer to the Linux command rules to operate. 3)
Using “root” enter, input command: mount/dev/mnt this command is used for
secured USB disk on /mnt menu. “/mnt” will produce a menu for users. Before you disconnect the secured USB disk, input
command: umount/mnt this command is used to disconnect the secured USB disk.
You must use this command before you disconnect the secured USB disk, or else
documents may be lost. The command “/mnt” and the above “/mnt” are implicative. Secured USB disk’s secured area can be used
in Windows 98/Me/2000/XP. It carries USB disk lock; users must input accurate
user passwords to save data. Secured USB disk lock/unlock
application program is in the format program, When USB disk is formatted to
secured USB disk, application program will work automatically. The
application program includes the following functions: --User login password --Edit user password --Format secured USB disk Q) How can I change the password for the "secured disk"? A)
There are two different ways that you can use:
1) Via SULOCK.exe choose "Change password" to complete
2) Open sFormat.exe, choose "format security disk", enter the
existing password. Then enter the new password and confirm. Choose
"set new password" and your new password is then effective. If you
choose " save initial password", the new password will be "888
888". The password you have entered will not be effective. Finally, plug
& play. Q) How can "secured disk" or "boot disk" be changed
to ordinary disk? A)
There are two methods:
1) Open sFormat.exe, do not choose "format security disk" or
"format boot disk", directly click "format" to format. If
you are using secured disk, you would need to enter the password.
2) Open sFormat.exe, choose "tools", then choose "device low
level format", you will not need any password. The following steps will be
choosing "yes" or "confirm", wait for the disk to finish device
low level format, the pendriver LED will light up. Q) Microsoft's program cannot format the disk, what can I do? A)
Please use sFormat.exe to format. Because it is ordinary format, you need not
choose "format security disk" or "format boot disk", simply
click "format" and format. Q) I have forgotten my password, what can I do? A)
You can use device low level format to solve that. However, the data in the
pendriver will be lost.
Steps are below:
Open sFormat.exe, choose "tools", then choose
"device low level format",
The following steps you will need to choose "Yes"
or "confirm",
wait for the disk to finish device low level format, the pendriver LED will
light up.
(When LED is flashing, do not pull it out, because this will
cause format error.) 4.2.1 Unlock When formatting the secured USB disk, choose “Format Security Disk” (You can see this in
the format introduction). After formatting, using secured USB disk lock/unlock program,
at Windows when you open up the security USB disk, you will see a logo. If you
would like to exit this program, right click and choose exit. Double click logo to
enter secured USB disk, as you will see in diagram 4.6: System
will automatically pop-up secured USB disk unlock tool software: (as you will
see in diagram 4.7) Now, at password, input
your password. Click “unlock” to unlock. Note: 1. Before
formatting to secured disk, the password is 888888. 2. When there isn’t any password,
automatic unlock will function. 3. If there
hasn’t been formatting to secured disk, lock/unlock program cannot function. 4.2.2 Edit password In diagram 4.7, click “change password”, diagram 4.8 will appear, enter
the old password once and the new password twice, then choose “change” and your password would be changed. Diagram 4.8 4.2.3
Formatting secured USB disk 4.2.3 Formatting secured USB disk
In
diagram 4.9 click “format” (This application program comes
with the product or can be downloaded from the website), diagram 4.10 will
pop-up. Users can choose “Format type” “fast” or “complete”. Instructions: 1)
It is not
possible to create new document file in the secured area. 2)
When
choosing “Format
BootDisk(Default), once formatting is complete, disk will automatically import
what is necessary for re-boot to opening documents. If “format security disk” is selected at the
same time, the document will be is the secured area. DO NOT DELETE/MOVE THOSE
DOCUMENTS, OR ELSE RE-BOOT WILL FAIL. 3)
When
choosing “format security disk”, USB disk will be in secured
status once process is completed. 4)
Choose “create SULOCK.EXE unlock/lock
programme” from “tools”, when format is complete, then it will automatically enter
SULOCK.EXE (as you will see in diagram 4.6) 1)
Before
removing the secured USB disk from the USB interface, check that the LED light on
the USB disk has stopped flashing. Do not refer to the logo on the computer as
accuracy of the data transit completion. 2)
In the user guide, Windows 98 refers to Windows 98
first edition and Windows 98 second edition. 5. Secured USB disk technical area Requirements: Computer: Need
to have USB interface IBM PC or any other computer, notebook computer, Mac
computer. Operation System: Windows
98/Me/2000/XP, Mac OS 9.x/Mac OS X, Linux 2.4.x Power supply USB: Current
(4.5V~5.5V) Capacity**: 16MB/32MB/64MB/128MB/256MB Main console interface: USB1.1 UHCI OHCI Work current: <80mA <500uA Data save*: At
least 10years Switch: Guard
write Built-in LED LED
light: Secured USB disk connects to computer successfully LED
light flashes: Reading/ Writing data Environment temp. -40°C ~ +70°C -50°C ~ +80°C Work time humidity: 10%
~ 90% Standard humidity: 5% ~
95% Data reading speed*: 500KB/S
Maximum Data writing speed*: 400KB/S
Maximum Measure (LxWxH): 80mmX23mmX11.5mm Weight: 12.8g Pass EMC standard
FCC (type B), CE *Just for reference. EMS reserves the rights to make any necessary
technical amendments without prior notice. 6.
Secured USB disk frequently asked questions. 1) When
I first used the secured USB disk as save disk, I inserted the USB disk into
the USB interface, system did not indicate that a new device was detected. Why
is that and how can it be solved? Answer: First, check that the secured USB disk and USB interface
connection isn’t too loose, if there isn’t any problem with the connection, it might be that the BIOS setting
in the system has not enable the USB interface. You will need to restart
computer, enter BIOS settings and enable USB interface. Another problem might
be that your system USB installation was not done properly or the installation
was proper but the driver that supports USB was not started. Please refer to
the relevant user guide and correctly install the USB system. 2) When
I am using the secured USB disk, can I pull out the USB disk from the USB
interface directly and switch the switch on it? Answer: If you switch from disable write status to enable write
status, yes; vice versa, you must wait until the light stops flashing first. 3) When
I first used the secured USB disk, the operation system is Windows 98, the auto
install logo appeared but could not install the driver program correctly. I
tried to re-plug the USB disk and install again, but system popped up the
message “install new hardware” and couldn’t install the USB disk
driver program, just like the first time. How can I solve this? Answer: Please follow the steps below: a)
Insert the USB disk into the USB interface: b)
Insert the driver into the computer; c)
Use the mouse and right click “my computer” à “propertiesà “device manager”; d)
Delete “unknown device” or “other device” (With yellow ? or !); e)
Click “refresh”; f)
Wait for a moment, and install wizard will appear, follow
the steps of the install wizard until installation is complete. 4) When
I first inserted the secured USB disk into the computer, the USB disk was
detected as “unknown device” or “other device”, when I tried to re-insert the USB disk into the computer, nothing
happened. How can I install the driver program properly? Answer: Go to “device manager” and delete “unknown device” or “other device”, click “refresh”, wait for a while and the USB disk will return normal. 5) Can
data or document deleted from the secured USB disk be recovered from the “recycle bin”? Answer: No, documents that have been deleted cannot be recovered. 6) Can I
create a new document file on the secured USB disk directly? Answer: No, but you can in the general area. 7) What
does the LED indicate on the secured USB disk? Answer: When the LED is light up, it means that secured USB disk has
accurately connected to computer however; there isn’t any data transmission at the moment. When LED flashes, it means
that secured USB disk is reading or writing data. However, in Windows XP
system, system will inspect the secured USB disk working status from time to
time. This causes data transmission and therefore even though USB disk is not
in working status, LED might flash slowly. 8) What
should I notice when I insert the secured USB disk? Answer: When you insert the secured USB disk, do not pull it out
straight away. Especially not pull out and plug again and again because there
is a necessary reaction time that the system requires. There should be a
difference time of 5 seconds or more. 9) Can I
insert more than one secured USB disks into the same computer? Answer: Yes, theoretically the maximum is 127. However, because the
driver disk uses 26 letters of the alphabet and there are already other drivers
using a few of them, you can only insert 23 secured USB disks (excluding
A,B,C). USB HUB also needs assistance. 10) When writing/reading secured
USB disk, can other programs be operating? Answer: Yes, but if you have installed “Norton AntiVirus”, especially when you are
in “Norton AntiVirus Auto-Protect Enabled” status, you cannot “format security disk”. This is because “Norton System Works” will regards secured actions to be Virus and will damage drivers.
To solve this, directly change the Norton System Works status to Disable
Auto-Protect (“Norton AntiVirus
Auto-Protect Disabled”). Then start “format security disk”. 11) Can the secured USB disk be
formatted under Windows 98/ME/ 2000/XP/ Mac OS 9.x/Mac OS X/Linux 2.4.x? Will
the application software be lost after formatting? Answer: Yes, but only the general and secured area recognized by the
system. As for the application software that is included in the USB disk, it
will not be lost because of formatting. 12) Can I use Windows ScanDisk to
scan the secured USB disk? Answer: Yes. 13) Can I pull out the secured
USB disk when the LED on it is flashing? Answer: No, LED flashes to represent that data is being transferred.
If you pull it out at this time, data may be lost or may cause damage to the
FAT graph and end up with a blue screen. 14) What will happen if an
application program like Microsoft Word opens document from the secured USB
disk and when it is not yet closed, the secured USB disk is pull out? Answer: There will be a blue screen, press “Esc” to escape. 15) Can the secured USB disk be
used on LAN? Answer: Yes 16) How can I use my secured USB
disk more conveniently when the USB interface is at the back of my computer? Answer: You can use the cable (A-Type Plug and A-Type Receptacle)
that comes with the USB disk to extend the distance of the secured USB disk and
USB interface. 17) Where can I find the secured
USB disk driver program for Windows 98? Answer: There are 3 ways to get it: it is included with the secured
USB disk, download from
http://www.hkems.com/chinese/download.htm
or
email to us and ask for the driver program. Email: sales@hkems.com EMS USB Dragon
![]()
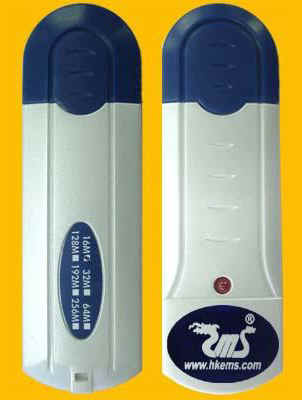 Diagram1.1
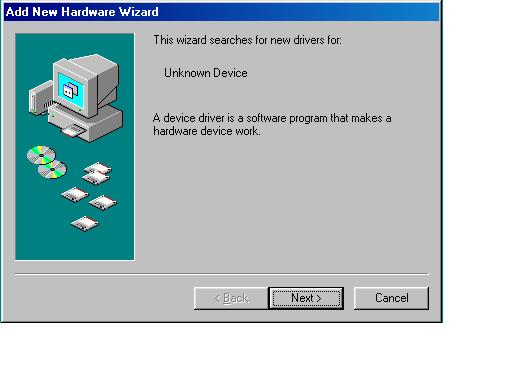
![]() Diagram 4.1
Diagram 4.1 ![]() Diagram
4.2
Diagram
4.2  Diagram: 4.3
 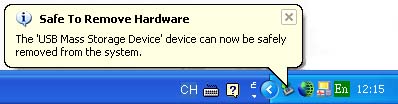 Diagram:
4.4
Diagram:
4.4 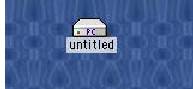 Diagram 4.5
 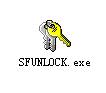 Diagram 4.6
 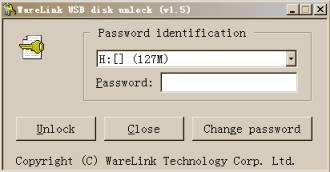 Diagram 4.7
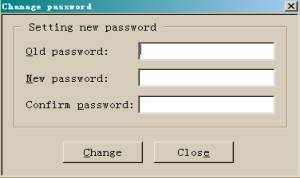 Diagram 4.8
 ![]() Diagram 4.9
Diagram 4.9
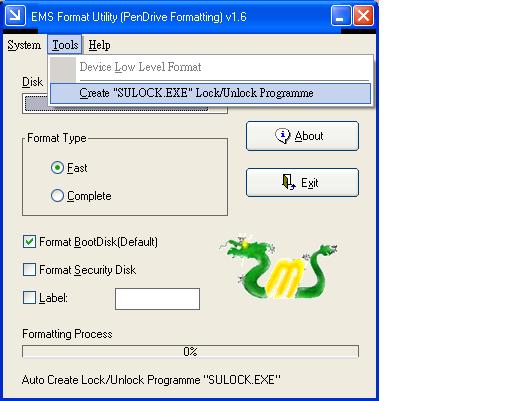 Diagram 4.10